This is not going to be detailed in features as I have already gone over them all in the shapes in this drawing. If he were smiling for instance, I would give you a smiling tutorial to go with it.
Right, here goes!
Step one:
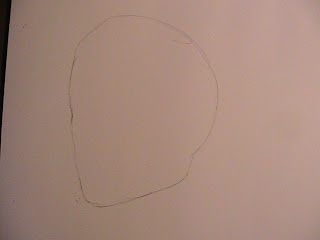
Draw the outline of the face. If you feel more comfortable, do it as I have. If not, feel free to break it up into steps. One step could be a large circle. This will represent his skull. Then you can add on the jaw in a similar shape as mine.
When you feel that this looks OK then we can move on to step two. Don't worry to much though. If, when you start adding features, you feel that the outline starts to look wrong you can change it when ever you want.
Step two:
I have added a line down the middle of the face. Just like in the front facing tutorial, except now the line is more to the left.
After you have done this, add a second line across the face at eye level. Remember from tutorial one, that the eyes are half way down the face.
Again, use the mid line as a reference and put in some smaller line to remind you where the mouth and the bottom of the nose should be.
Step three:
A nose. It is fairly simple so I haven't taken a close up picture, however, to explain; draw a fairly straight line from the middle of the eyes to three quarters down the face. End the line in a curve and to the right of it, draw a small curve for the nostril. Beside the nostril is another curve that indicates the wing of the nose.
Step four:
In this step I have done two things. One; I added a mouth. It is curving slightly in a smile. Draw another line to indicate the start of the shadow under the lip, and another dash for the top lip.
Two; I became unsatisfied with the chin and made it bigger. I will continue to make corrections to the chin through out the drawing process. Feel free to do the same thing yourself.
Step five:
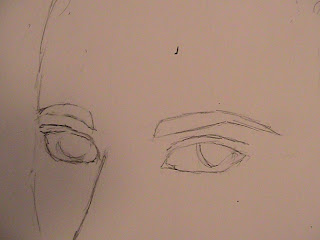
This character is looking at the us, so his irises are not in the middle of his eye. This is a good time to practice the trick about the eye lid. The upper curve of the lid is always above the iris. Even if the iris is not facing forward.
Also remember in this position the far eye is foreshortened. I forgot this in this stage, but you will notice that in step ten it is corrected.
Step six:
Eyebrows make him look more masculine, especially when said eyebrows follow these three criteria.
- Thick
- Lower over his eyes than female eyebrows.
- Less of a gentle curve and more of a 'joint' before the eyebrow slopes down.
Step seven:
I have added and ear. Notice it's shape, try to copy. I have not published and ear tutorial because they are all to easy to hide with hair. However they are fairly simple to draw and you shouldn't find it to difficult.
Step eight:
In this I have added a hair line. Notice how suddenly his face has shape, and his head doesn't look so odd. If you have difficulty with finding the right place to put you hair line just look around you. Look at your friends heads, look at your own.
Adding the back of his neck also helps to give his head shape. Make sure you draw it behind his jaw, not coming out of it.
Step nine:
OK, so now I've given him some hair. I haven't drawn every strand, that is impossible. I have however, given him a general shape of how his hair is going to look.
Step ten:
Alright, now comes the fun part. Eyes breath life into your drawing. They give personality to an otherwise dull picture. I have added some more shape to his eyes, along with the tear duct in the inside corner. I have also drawn a upper lid.
Step eleven:
Oh my gosh! He looks like a girl! Don't worry, boys have eyelashes too. It will all work out in the end.
When drawing eyelashes, always start from the bottom of the top lid and curve up. As you move across the lid the lash will turn so it faces the viewer more. Don't be afraid to do this.
Step twelve:
Doesn't look so girly now, does he! Maybe just a little girly. But anyway, when drawing the inside of the irises make sure you leave a highlight. It needn't be big, but make sure you do. It makes the eye look wetter.
Also, just while we are on the topic, make sure you give shadow to your eyes. Just because the white is called white, doesn't mean it is. There can be shadow on the eye too.
Step thirteen:
Give the lips shape by shading.
Note the shape of the shadow under the bottom lip. It is in a sort of semi-circle shape.
Step fourteen:
Here is our character with shaded mouth as well as coloured brows. The mouth looks odd when it is the only thing shaded. That's why I recommend that unless you are planning to shade the whole piece, then leave the lips as line work, as in step nine.
Make sure his eyebrows mach his hair colour with in a few shades. Most peoples eyebrows and lashes are a few shades darker that their hair colour.
Step fifteen:
There, all done. Shading and hair colour done. Enjoy. If you have any further problems, please contact me at:
simpleartlessons@gmail.com
or leave a comment.
Until next time,
cheers guys,
meg


